twitter
rss

Showing posts with label Creative Kids. Show all posts

Writing.  Some people really enjoy it and others...well...they don’t.  I fall into the “enjoy it when I’m in the mood” camp.  It’s a great release, the ability to articulate one’s ideas onto paper is just amazing to me.  Of course lately I haven’t been in the mood for writing-which sadly includes blogging-. The ideas are there, I've even started a few blog post, but the desire just fizzes. I blame lack of sleep and far too many commitments.  So what do you do when life’s comings and goings impede on your desire to put pen to paper (or fingers to keyboard)?  You do a rewrite. Yes, I’m rewriting our life.  Slashing commitments from our schedule and slowly retreating back into our little den, similar to life circa 2011, but with a few more friends, and a co-op that we may or may not do again next school year.  

Our move back to the states was a curse and a blessing all in one. We, finally, have all of the opportunities that I wanted the boys to have and experience, but those opportunities bring with them commitments of our time, money, energy, as well as a whole lot of extra stress. Which has a tendency to zap what little energy reserve a mother of three has to start with and I’ll admit I’m a bit selfish.  At the end of the day, after teaching, feeding, cleaning, refereeing, and generally keeping all three of them alive I still want to have energy for my own hobbies and interests. I don’t currently have that and it depresses me-which isn't good-.

As a way to help usher in our lighter load and to help motivate my fingers to get back into typing I thought participating in NaNoWriMo -instead of just talking about possibly participating one year in the near or distant future- would be a good idea. Then, I found out they have an option for kids and I got really excited and the little wheels in my sleep deprived brain started turning.  

I've mentioned before that we were moving to a one subject a day type of school schedule and we've been doing really well with it. It’s removed a lot of the pressure that comes with feeling like you have to cover everything in one very long day.  Instead we focus our energies on one core subject for that day and highlight things that need a bit of repetition to stick, usually using games or relaxed question and answer sessions before dinner.

After looking over the NaNoWriMo information I thought what better way to expand on this idea then by focusing just on reading and writing for the month of November. Their readings would be a mixture mostly fiction with a healthy dose of books that tied in history and science so those things aren't completely neglected. They would also still be free to play their educational math apps and other little games. I may even have them do a math lesson or two if they experience writers block, but our overall focus would be on letting our imaginations come to life on paper.  They both already love telling their own stories at bedtime and General Disarray has been working hard on a series of short stories over the past few months, this just seems like a natural progression for their already creative minds.

This will also be a great segue for them as well as myself into what life is going to be like after November.  Less distractions, more time to pursue our creative selves in the comfort of our home, and more emphasis on being present in what we’re doing instead of just going through the day to day motions and checking things off of a calendar. Feel free to call us hippies, it really doesn't matter as long as we’re enjoying what we’re doing -at least 90% of the time-.

Now you might be asking “Can your kids really write a novel in a month?” Maybe. Hell, I don’t even know if I can get it done.  The beautiful thing about NaNoWriMo for kids is that they get to set their own word count, and they have a nifty word count calculator to help kids determine what their goal should be.  Now obviously General Disarray will have a higher goal count than his brother because they are at two different stages in their writing abilities. For General Disarray I really want him to just write, I figure the more he does it the better he will get at it. I also think he has enough ideas with his short stories to really produce a fun novel. With Professor Chaos this is more about helping him see, in an applied way, how a story grows and develops. Basically, it will be for teaching him the parts of a story and helping him to learn how to go into more detail and tie parts of a story together.  Since he struggles with writing we’ll be using dictation for his story.  

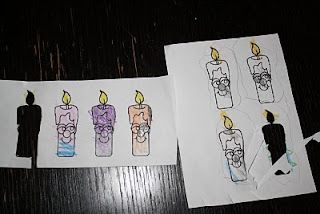
I plan to take it a step further though and after it’s all over I’ll print out their novels and have them illustrate them, then we’ll bind them and they’ll have their very own book. Told in their own words, illustrated with their own art work.

NaNoWriMo’s Young Writers Program does make it easier to do something of this magnitude.  There are plenty of resources on their website for anyone interested in giving it a go with their kids.  They even offer a free PDF workbook (three versions so you can pick the one that fits your child’s grade range) which we’ll be using to kick off the program towards the end of this month.

Hopefully, we’ll all come away from this with a little more passion for creating words on paper (or electronic paper) and three awesome novels.

Copyright(c)2013 Rayven Holmes


And this is why we call him Professor Chaos.


I think it might be time for mommy to go back to only using the computer in the evenings once the little ones have gone off to bed. Unless I want to spend some more time getting glitter out of well…everywhere!

Copyright(c)2011 Rayven Holmes

For our science work the past couple of weeks we have been talking about flowers, plants, and photosynthesis. In order to help us we did some flower dying! Now we didn’t get the idea from this lesson plan, but it pretty much explains what we did. The only difference is that the one we used said to use one glass of colored water, and one glass of regular water. This seems to make it take longer for the whole flower to become colored *we’ll have to test that hypothesis at a later date to be sure*. The one big thing I would strongly recommend is that you hunt down carnations!

Every mention of this experiment calls for white carnations, but we couldn’t get our hands on any. So instead we had to use white roses, and while they are pretty, they aren’t cheap, they lack the fullest of carnations, and their stems are a bit thinner than carnation stems so splitting them is a little more difficult. All and all it worked out really well and the boys loved seeing their favorite colors appear on their flowers.

This week we are starting dinosaurs! Oh the fun we will have learning about those amazing creatures.


Here we have the two glasses and the split flower. I had to cut the flower shorter, and getting the right size for the glass was a pain. They still turned out great though. I used tape to keep the stem from splitting more.

The other flower required me to use tape to keep it from leaning out of the glass, along with a knife to weigh it down.


What they looked like before they changed colors!

Copyright(c)2011 Rayven Holmes

Hanukkah *or Chanukah* started on the 1st and we are currently on day three of our yearly Hanukkah lessons. So far once again we have gone over why Jewish people celebrate Hanukkah, what the menorah is as well as the name for the tallest *lead* candle-the Shamash-*because it is hard for little kids who aren’t Jewish to remember all this stuff since they only hear about it once a year*, and we’ve done some crafting *with more to come*.


So far each of the boys have made a Star of David, which once completely dry, they will further decorate and then we will hang them up to go with the rest of our holiday décor. I also found a great template online that has turned out to be the perfect window menorah. I colored the Shamash and each of the boys got to color four of the candles. We are alternating turns, and on their night they will pick which of their candles gets cut out and placed *glued* into the menorah.

After it is glued in, the menorah is returned to its place in the window, which fulfills the mitzvah *commandment* that the miracle of Hanukkah be publicized.
While that is my reflection that IS NOT my van...just wanted to put that out there. LOL.

We are currently in the process of getting a silver menorah, but it won’t be here until after the holiday is over, so I figured we would once again make our own menorahs. Last year we used an empty egg carton, some air dry clay, and birthday candles. This year I got a bit creative and made each of the boys menorahs in the shape of the Star of David. I’ve been waiting for them to completely dry before I allow the boys to paint/decorate them. After which we will have our window menorah to fulfill the mitzvah and then the boys will have ones they can actually light.

Aside from the more crafty things we will also be using our Knowledge Books starting today. I have finally finished filling them with Hanukkah coloring pages and worksheets to go along with our studies. Today we will learn where Israel is, as well as what their flag looks like, we will spend some more time discussing the Star of David, and learn a bit more about the Maccabees.

To add to our studies we have a Hanukkah word wall and our nightly bedtime story has come from a list of Hanukkah themed books I gathered at the library.

To bring in the food element we will be having a traditional Jewish meal either Saturday or Sunday night *I had wanted to do this the last night of Hanukkah but life happens and plans must change…*.

On Monday our co-op learning will be an extension of what we are doing at home, then on Tuesday we will focus on just the dreidel with activities that center around what the boys often call “Their favorite thing about Christmas”, which always ensures a puzzled look on someone’s face when they ask “What’s your favorite thing about Christmas”. We will learn a bit about gelt as well, including the history behind giving coins *especially chocolate ones* during Hanukkah. I’m not 100% what to do for the last day, I’m thinking a review of everything, possibly a large craft, and eating of their favorite items from our weekend meal.

Well that’s pretty much it folks. Not too involved, most of it is centered around reading, some coloring pages/worksheets, and crafting. Which works very well for their age groups. Each year we’ll get more into the history, maybe visit a synagogue so they can experience a Hanukkah celebration like the ones we’ve been reading about. But for now I’m going to attempt to make yummy latkes and sufganyot, not burn the challah, and hopeful win the next game of dreidel!

Here is our booklist:

Hanukkah by Norma Simon
Beni’s First Chanukah by Jane Zalben
Moishe’s Miracle: A Hanukkah Story by Laura Melmed
The Runaway Latkes by Leslie Kimmelman
A Picture Book of Hanukkah by David Adler
On Hanukkah by Cathy Fishman
When Mindy Saved Hanukkah by Eric Kimmel
Pearl’s Eight Days of Chanukah by Jane Zalben *it features an activity for each night!*
Hershel and the Hanukkah Goblins by Eric Kimmel *a friend of mine shared that he loved this story as a child, so I’m eager to read it to the boys*
And last but not least Our Eight Nights of Hanukkah by Michael Rosen

And here is the link list:

Link 1
*activities, crafts, coloring pages, recipes, and more*

Link 2*word wall, games, songs, crafts, coloring pages, and more*

Link 3*Hanukkah information, crafts, reading list, coloring pages -where our Israel flag coloring page came from-, and more

Link 4*crafts-Star of David craft came from this site-, recipes, coloring sheets, and more*


And lastly just for fun:


HAPPY HANUKKAH!!


Copyright(c)2010 Rayven Holmes

I mentioned previously that we are learning about ancient Egypt in history. In order to keep with my full immersion in the time period idea, we *more like I* made traditional Egyptian kilts for the boys to wear. They will wear these *as well as some Egyptian style jewelry* on our Egyptian day, but I thought today would be a great day to make them and discuss traditional Egyptian clothing.

Now traditionally Child #1 and Child #2 wouldn’t wear clothing, since Egyptian children didn’t wear clothing. Of course while they might enjoy this, I prefer they actually wear something instead of running around with their manhood hanging out.


So to start the Egyptian kilts we pulled out some old sheer curtains that are no longer useful, due to our move and the windows being much larger than the ones at our previous house. Child #2 ran around with one on his head while saying he was a ghost, meanwhile Child #1 gathered the rest of our supplies *tape measurer, scissors, and a pencil*.


After getting all the supplies in order we had to cut the large piece of fabric down to 36x18.


Then we had to cut off 6 inches from one side to use as an apron after the kilt was finished. Afterwards, I warped the fabric around Child #1 to ensure that there wasn’t too much extra fabric. Once we did the test fit, I pulled it off and finished up the kilt.


I measured 6 inches in on both sides, then I cut up the sides in a curve shape *not that great of a curve…but it’s close enough*.


Then I warped it around Child #1 using large paper clips to fasten it instead of safety pins. First I pinned the under portion to his shorts, then I warped it around *tucking the fringe into his shorts*, next I slid a paperclip onto the side. Child #1 said he couldn’t feel them at all which was great, and of course I didn’t have to worry about accidentally poking him like I would with a safety pin. Finally I tucked the apron in, instead of pinning it I just tucked it into his shorts. I had to fold the apron in half due to its’ size. Folding it turned out for the best, since it added an extra layer, which gave more cover in the front.

The Spouse was home today and thought the kilt was very cool. It's always nice when he gets to see the hardwork we put in first hand.

*Directions came from the Spend the Day in Ancient Egypt workbook.*

Copyright(c) 2010 Rayven Holmes

Or better know as the EPIC fail. For science we are currently learning about the solar system, so to show the awesome power of the sun we made a solar oven out of a pizza box. The goal was to make s’mores…and while they did turn out pretty good…we thought there would be better results considering how long they were in the oven.

The epic problems:

1) The pizza box we used was not as secure as it should have been in order to keep the heat in. I ended up taping around it, in an attempt to lock heat in. But it didn’t work out that well.

2) We used regular kitchen plastic instead of a heavy duty plastic, which for one didn’t fit right so I had to use two pieces which created an overlap that I am sure let heat out. And two it wasn’t secured tight enough to keep heat from seeping out of the sides.

3) We did it early evening time *around 2-3pm* instead of early in the day about 1130am-12pm when the sun is highest in the sky. There was also a good helping of cloud cover by this time, versus early in the day when the sky was clear. It was hot and humid like always, but the sun rays are the most important part when using a solar oven and we didn’t have enough of those.

So what would we do differently? Well instead of making a solar oven out of a used pizza box, we will use a regular box and follow THESE instructions.

We’ll also start earlier in the day, and place an oven thermometer inside so we can check out the raising temperatures *and ensure the temps are actually going up because hot air is staying inside*. Hopefully it works next time, not sure when we will do it, but we will.

And if it works really well the second time around, we may cook in it once a week. But we will see if that is so after we actually have a successful s’mores meal!


Copyright(c) 2010 Rayven Holmes

Two weekends ago we embarked on an archaeological dig! Since we started our history study with learning about archaeologist and what they do, I decided the boys should get some hands on learning by going on a dig. We unfortunately don’t live near any dig sites so we had to improvise, but considering their ages it was probably better this way.

In order to do the dig we bought a plastic tub, some sand *although here it is the coral beach sand so that was an interesting element but we made it work*, and some discarded pottery I was able to get from the craft store for free.

I filled the tub with the sand and hid the “artifacts” while the boys played in the living room. Then I equipped them with brushes to clean off their artifacts, plastic cups to help them dig, aluminum pie plates to hold their “discoveries”, and hats to protect them from the “sunlight”.

For the next 30 minutes or so the boys went about digging up artifacts and we talked about archaeology/archaeologist. It was good fun and a great way to kick off our history learning which will be very hands on at times *with us spending the day living in times long past, immersing ourselves in the cultures and times*.

Copyright(c) 2010 Rayven Holmes

I have another awesome homeschooling find to share with you all! There is a FREE online homeschooling magazine out there, what makes this magazine special you may ask? Well this magazine is made by homeschoolers for homeschoolers. I don’t mean the parents doing the schooling I mean the ones we are teaching!

Yes ladies and gentlemen, kids make and publish this online magazine, just for their peers! *Yes parents can enjoy the issues as well, but it’s really cool what kids can do when given the freedom to be creative*.

The current issue is titled the Summer Fun Issue, and it is jammed pack with awesome ideas, helpful hints, safety tips, recipes, poems by homeschoolers, well the list goes on! So hop over and check out Homeschooling Kids Magazine for yourself, and sign your homeschooler up for this free monthly treat!